Pinewood Derby Final Build
My twin boys crossed over from cubscouts to boyscouts this year. Since this was going to our last year to participate in the Pinewood Derby, I decided to try to put something really cool together for the finale.
I had a close friend that had great success with creating some awesome lighted costumes using arduino boards and some NeoPixel LED light strips. I also felt inpsired by a recent trip to our local Maker Faire which takes place at Larsen Motorsports, a race car shop that specialized in Jet Cars!
Creating the Fan Jet
I started the project by working on making a jet fan. My general idea was to power it with a small hobby DC motor. I had some really nice small fidget spinner / skate bearing that I could use to make it spin really easy.
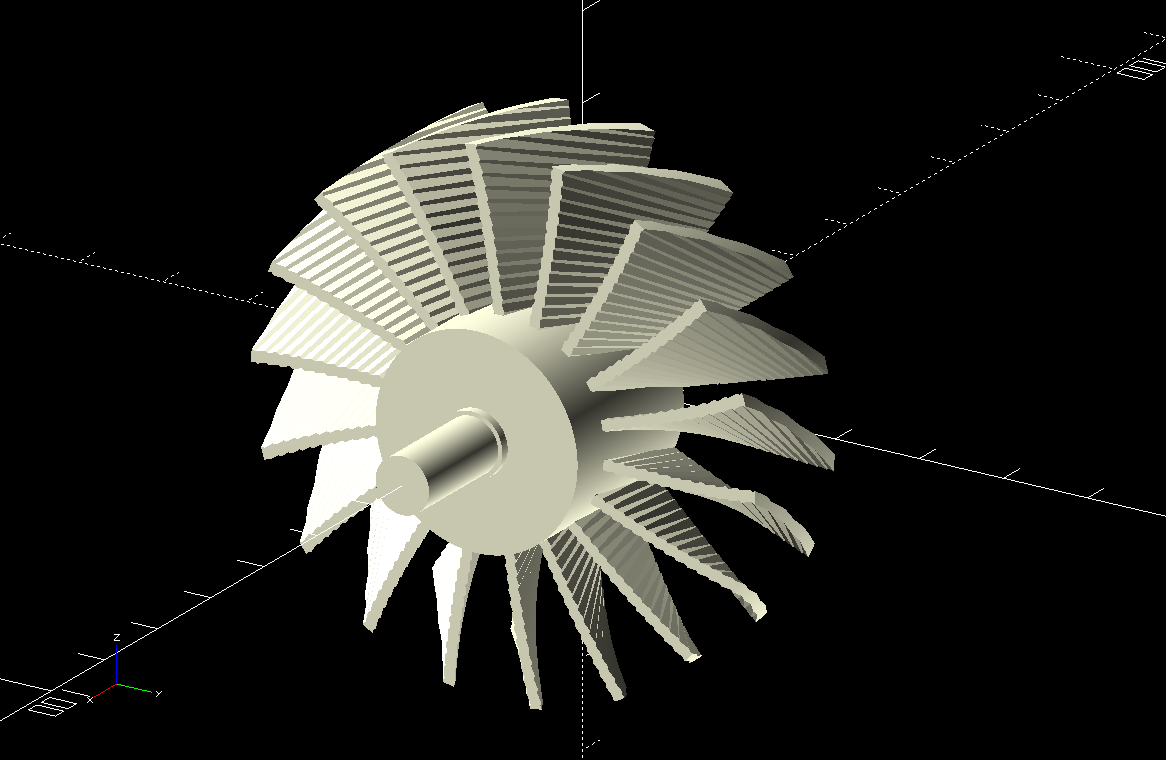
I started by making the fan blades in Open SCAD. The tool is kind of comfortable for me because I did my first 3d drafting in AutoCAD, and I'm used to writing code.
For instance, each fan is made of small fan blades. Each fan blade is modeled as a rectangle that gets extruded (kinda like squeezing play-doh through a template) while slowly twisting the shape. I create a module for the single fan blade in OpenSCAD so I can reuse this many times over on my fan.
module fan_blade(angle, width)
{
  linear_extrude(height=FAN_RADIUS+5, twist=angle,slices=30)
    square([width+10,1.5]);
}
I then add many copies of my fan_blade module, each of them rotated around a central axis. Since OpenSCAD is kind of like source code for 3d modeling, instead of copying and pasting the fan blade many times, I can make a little loop that adds them all for me.
for(i = [spacing:spacing:360])
{
  translate([-4,0,0])
    rotate(a=i, v=[1,0,0])
      fan_blade(blade_angle, 15+8);
}
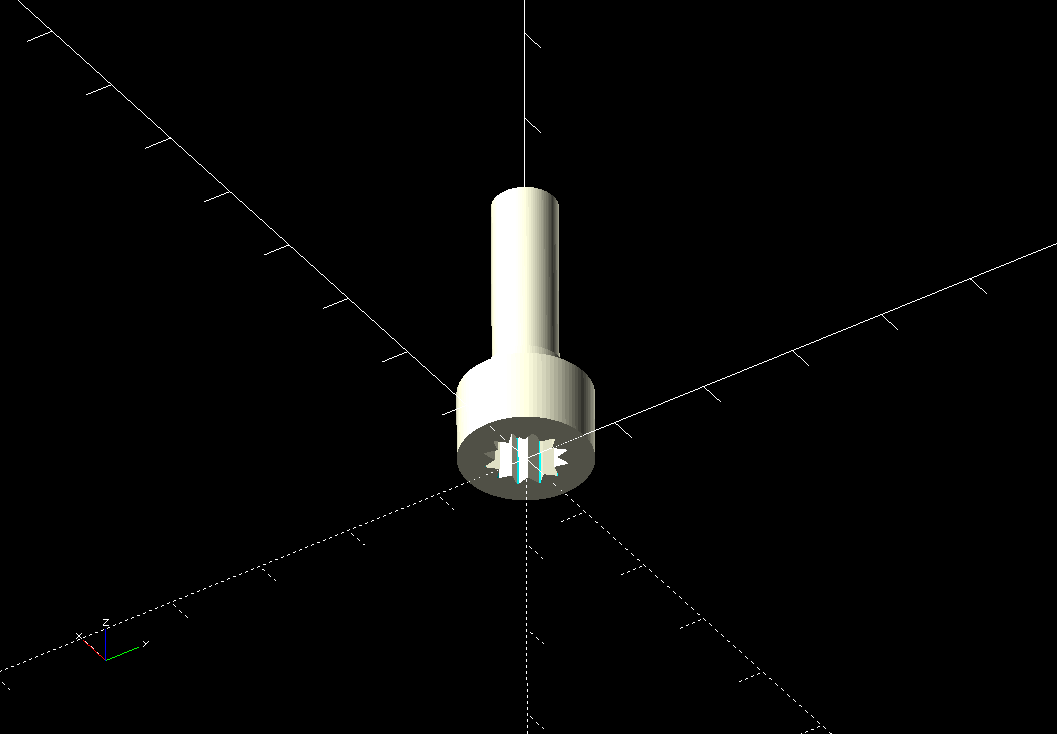
I then similarly add central drive shaft all the fan blades will be attached to. And that central drive shaft has a male end, and a female end, so you can stack fan blades on top of each other.
The size of the drive shaft was picked because I had some nice leftover rollerskate bearings from a science project that used fidget spinners. I created a shroud for the fan blade, and in the middle of the shroud I put a mount for the bearing. The same shroud could go on both the front and back.
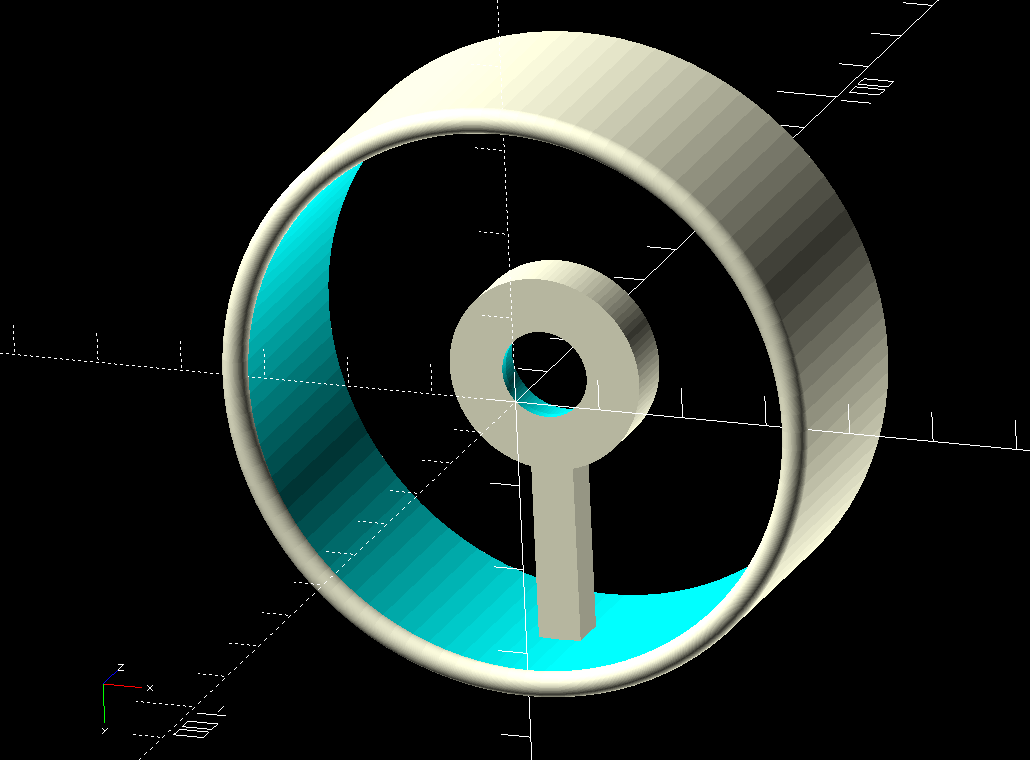

It has a hole in the back so that more fans can be stacked together, and still be relatively stable when you spin them, and all spin together. I was easily able to make the fan have more blades, or different angles of the blades. I've noticed that real jet engines had different sets of fans like this, but I'm not sure what the purpose behind it is.
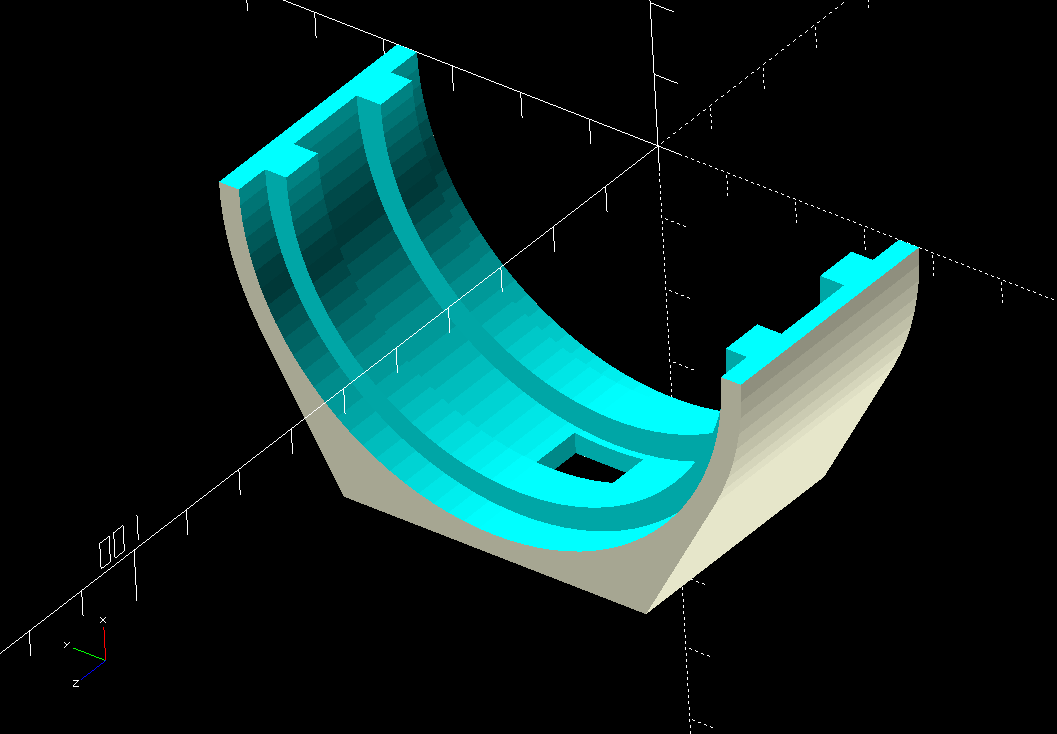
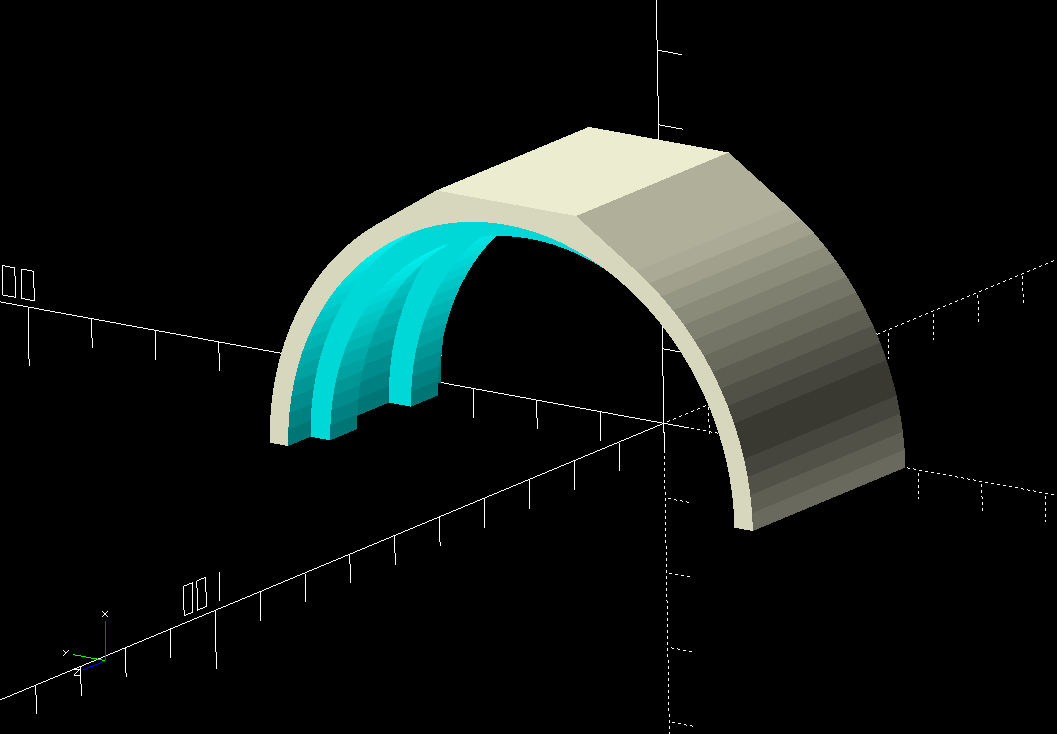
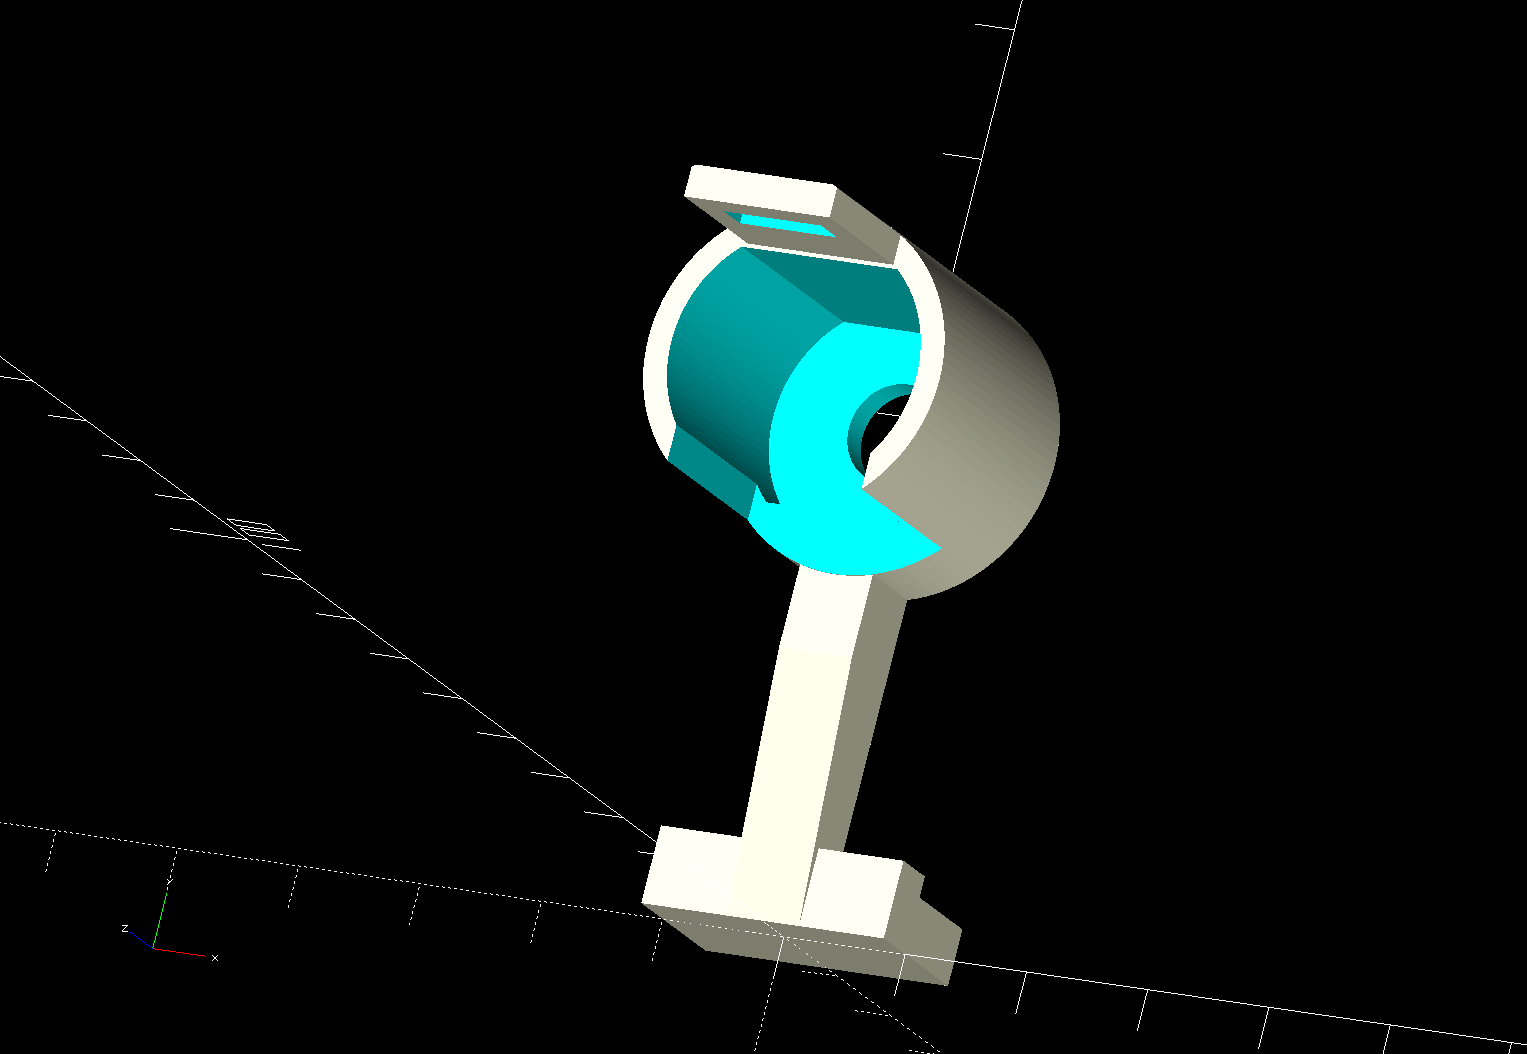
I built a coupler that would join the 2 shroud ends together in the middle. My plan was to have a strip of NeoPixel lights in this shroud. I could then create an affect of 1 light spinning around the inside of the shroud (a rotation effect?) I thought I could also spin the light faster and faster until it was just on constantly on, and then have the lights flicker between oranges and red tones to make it seem like an afterburner was burning.
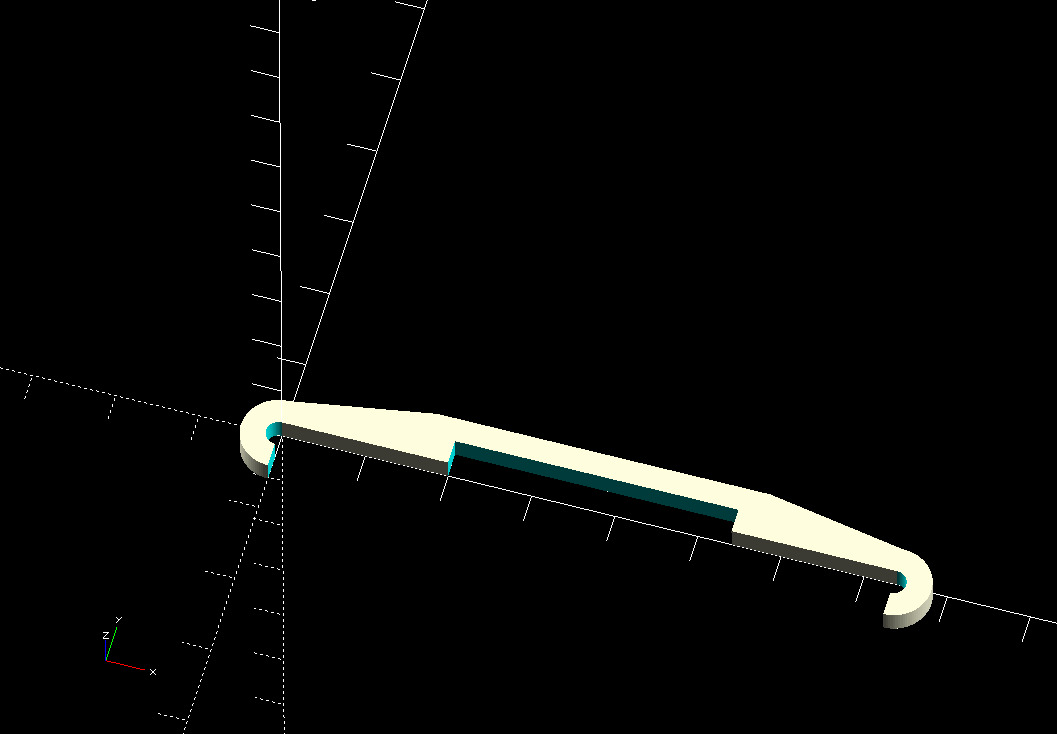
The coupler had a center recessed channel that would hold the lights. I glued the lights into the coupler with hot glue. Hot glue probably wasn't a great idea because it was so stringy when you tried to stop glue flow. I could have easily missed some of these stringy pieces and got them stuck in rotating parts of the fan. A lesson learned for next time is that the lights easily show right through the transparent plastic I was using. I should have enclosed the channel that I had the lights in (atleast every inch or something and just avoided gluing it altogether.

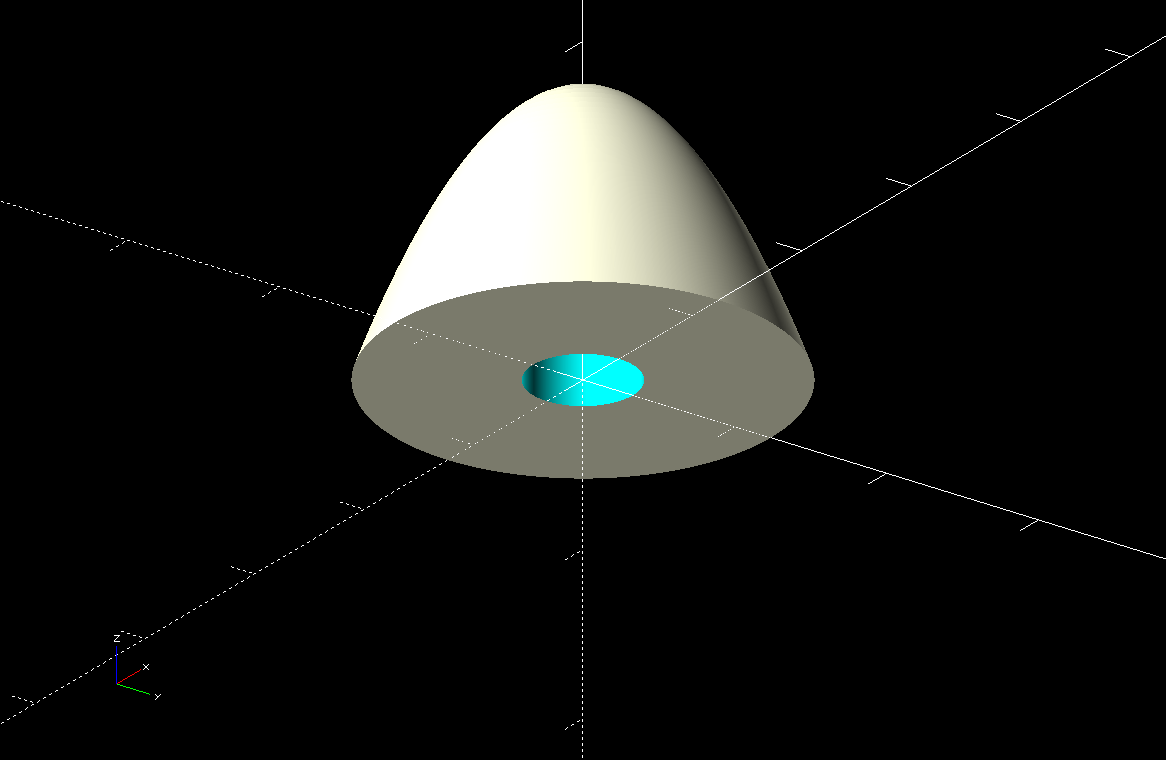
There was a hole in the bottom of the coupler and also modeled into it a flat part so I could easily glue it to the pinewood derby car. So after it was all assembled, it seemed to spin pretty smoothly. I also made some clip pieces to hold the whole shroud together. I made a little nose cone to shove on the forward end of the drive shaft for "aerodynamic purposes". I also needed to print out little spacers to use in a few spots to keep parts freely spinning.

A video of me spinning it up by blowing in it:
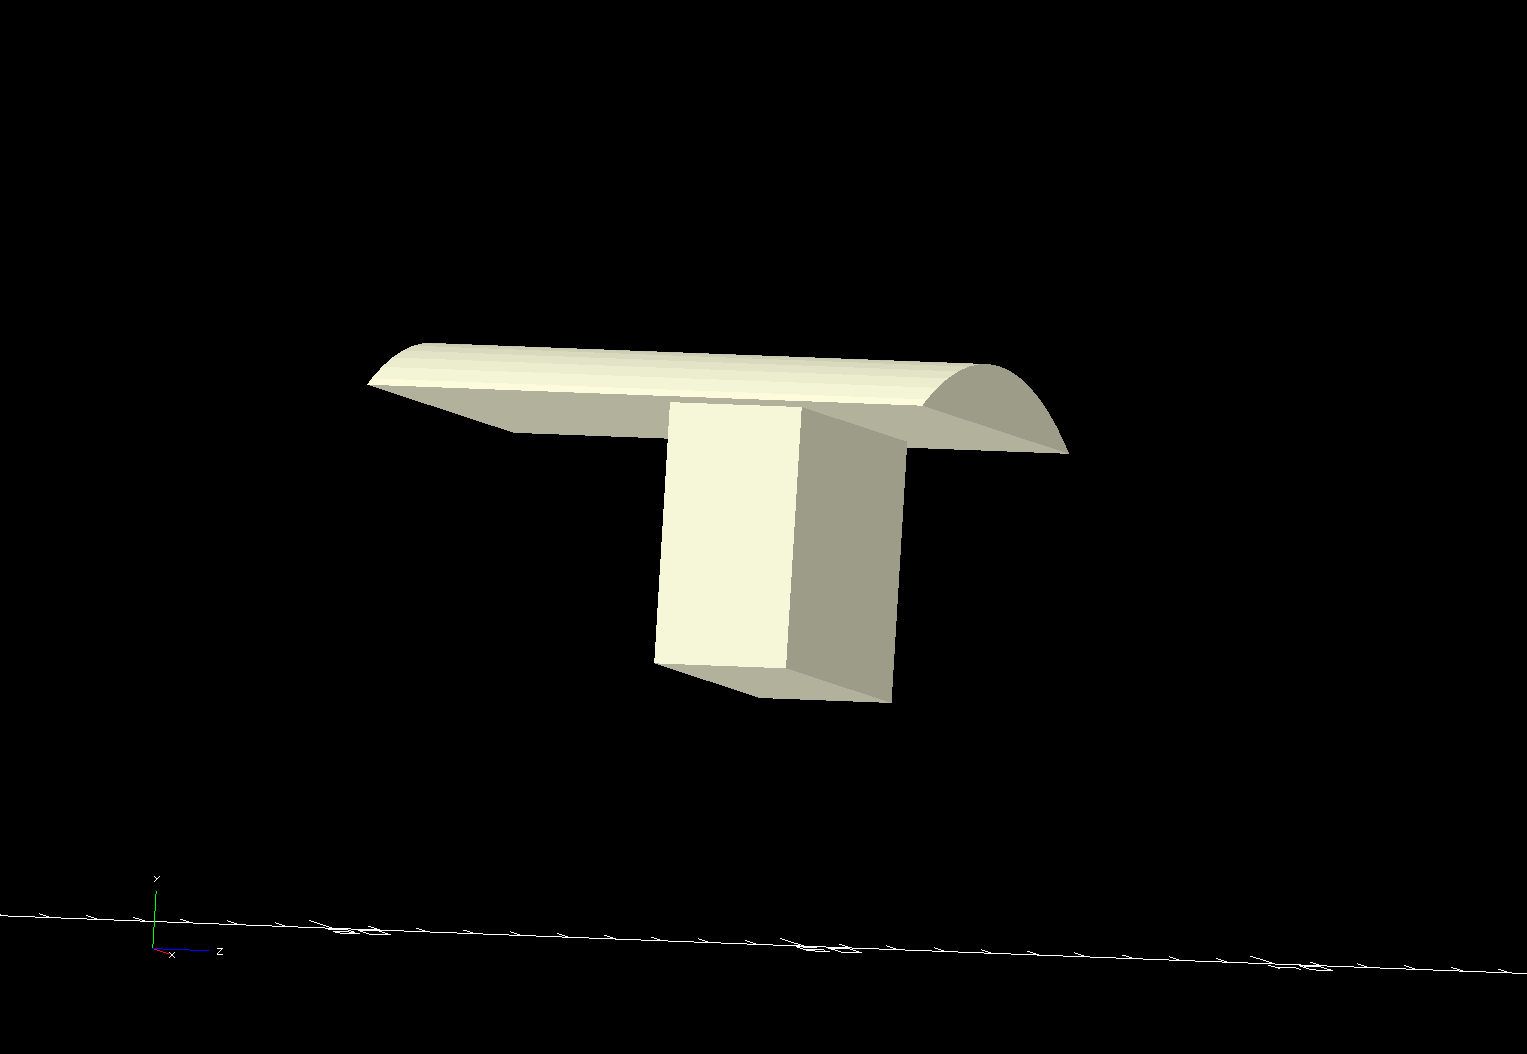
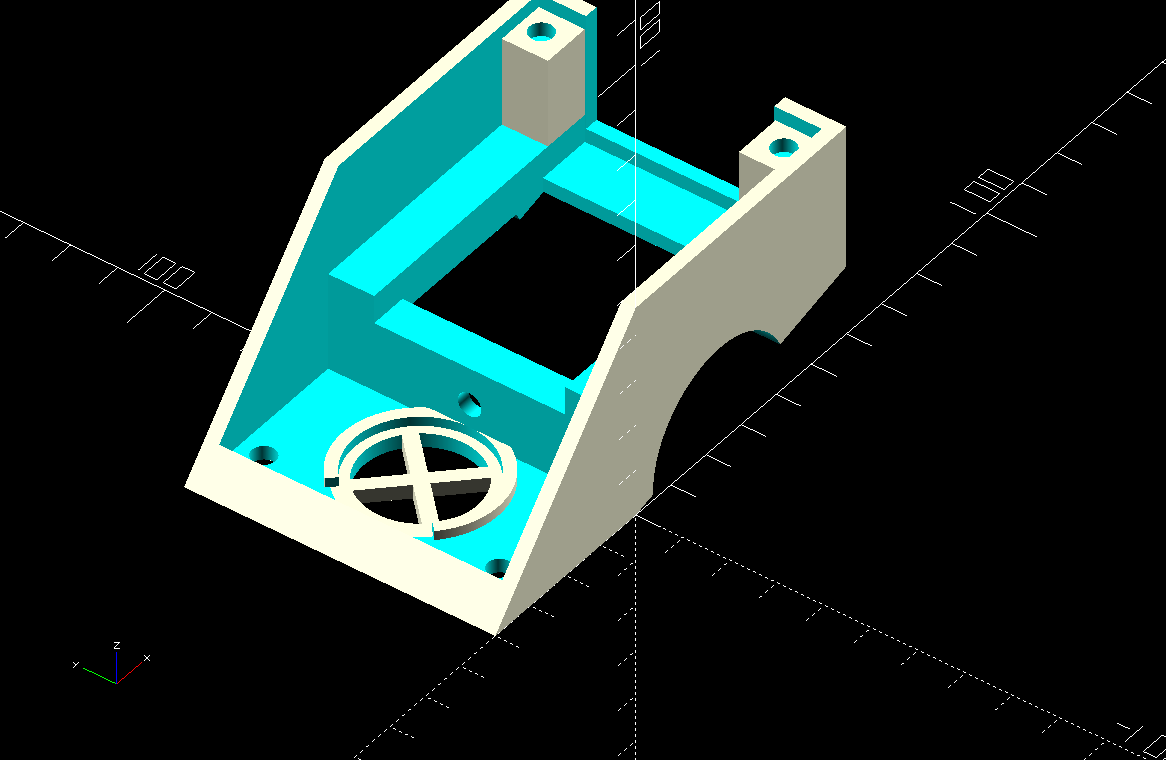
I bought a DC Motor Kit from Amazon.com to try different ones to power the little fan, I ended up using a small 9V-12V DC hobby motor that I've seen used often in small toys and cars. The motor came with a small gear already attached to the motor shaft, so I simply had to add a flange and subtract it's mating shape from the drive shaft I was creating. I then created a little motor stand / case to hold the motor at the right height to mate it to the fan driveshaft. I also built a little key piece I could drop into the motor mount that would hold the motor in place and keep it from backing out. The motor turned out to very snug in there, and didn't really back out on it's own anyways.

The turbo fan 3d design files are on my github. The fanblade.scad file contains the entire design in a single file. At the bottom of the file there is a section where I call out each module. I would uncomment a single module at a time from this section, render the model, and then export the STL. I would then comment that module back out, and uncomment the next one, render, etc to create STL files of all the pieces. I then printed them out on my Monoprice MP Select Mini 3D Printer with Clear PLA Filament.
// Uncomment 1 at a time to print

// fanNose();
fanDrive1();
// fanDrive2();
// driveShaftSpacer(3);
// turbine_shroud_end();
// gear_shaft();
// shroudCouplerBottom();
// shroudCouplerTop();
// shroudClip();
// motorMountToCar();
// fanAndMotorPlate();
Electronics Build
At the same time I was coming up with and printing parts for the jet fan, I was also working on coming up what electronics I would have in the car to power my jet fan, turn on the lights, and play some sounds. The NeoPixel lights require pretty precise timing for control, which rules out using Linux boards like the Raspberry Pi. The NeoPixels really need to be controlled by a microcontroller running on baremetal like an Arduino board. The standard Arduino form-factor is kind of large to use in an application like my pinewood derby car, but it would be really nice to find a board that had stackable shields like the Arduino boards do. And since I can't use Linux to play some tunes, I would need to find some kind of standalone board that could help me play music and sound effects.
I settled on using the Adafruit Feather form-factor. There is a good selection of wing add-ons board that you can stack on them for different applications. Adafruit simply can't be beat on reliable non-counterfeit products, helpful design documentation, and example code to start with. The feather controller boards can be had with many different processors, built-in Li-Po charging support, and usually some kind of "accessory" package on the main processor board. Most of the pictures below are from Adafruit's website because I didn't good pictures of the bare boards during the build, and it's really difficult to take apart now.
For the controller board I picked the Adafruit Feather 32u4 Bluefruit LE controller board. It has a built in Lipo charger like most of the feathers. The Atmel 32u4 processor is more than adequate for the small amount of processing I needed to do, and should last a really long time on battery. I picked Bluetooth for my remote control protocol. I also really like the LoRa radio (it can transmit really far), but I would have had to create my own remote control board, by using Bluetooth I can just use an Android phone.

I had actually started searching for audio solutions before I had picked the other electronic stuff. I had considered maybe using an Arduino for just the motor control and run the NeoPixels, and maybe use one of the small Raspberry Pi boards for audio, connectivity, etc. My first choice for audio was to get a MP3 player that had serial controls. The DFPlayer Mini looked promising, it was very small and easy to prototype with. Unfortunately after buying one I found out that most you get from Amazon don't come with the genuine YX5200 IC, and the knock-off parts never work right. I ended up in the situation as well, had all sorts of issues getting it to work, and was forced to keep searching.
My second choice for audio, and probably should have been my first choice, was the Adafruit Music Maker Feather Wing. It even has a build in audio amplifier circuit so you can power speakers directly from the board. It was easy to get working, but then I realized I was going to have a problem using it in my pinewood derby car. The Bluetooth radio on the main controller board used the same SPI interface that the Music Maker shield needed to use. Sometimes you can work around this and use each slave exclusively, but it seemed like the Music Maker shield used the SPI bus to transfer data from the SD card to the MP3 decoder itself, an operation that would happen quite often, and not just be a simple serial command to start or stop the music that would only happen every once in a while.

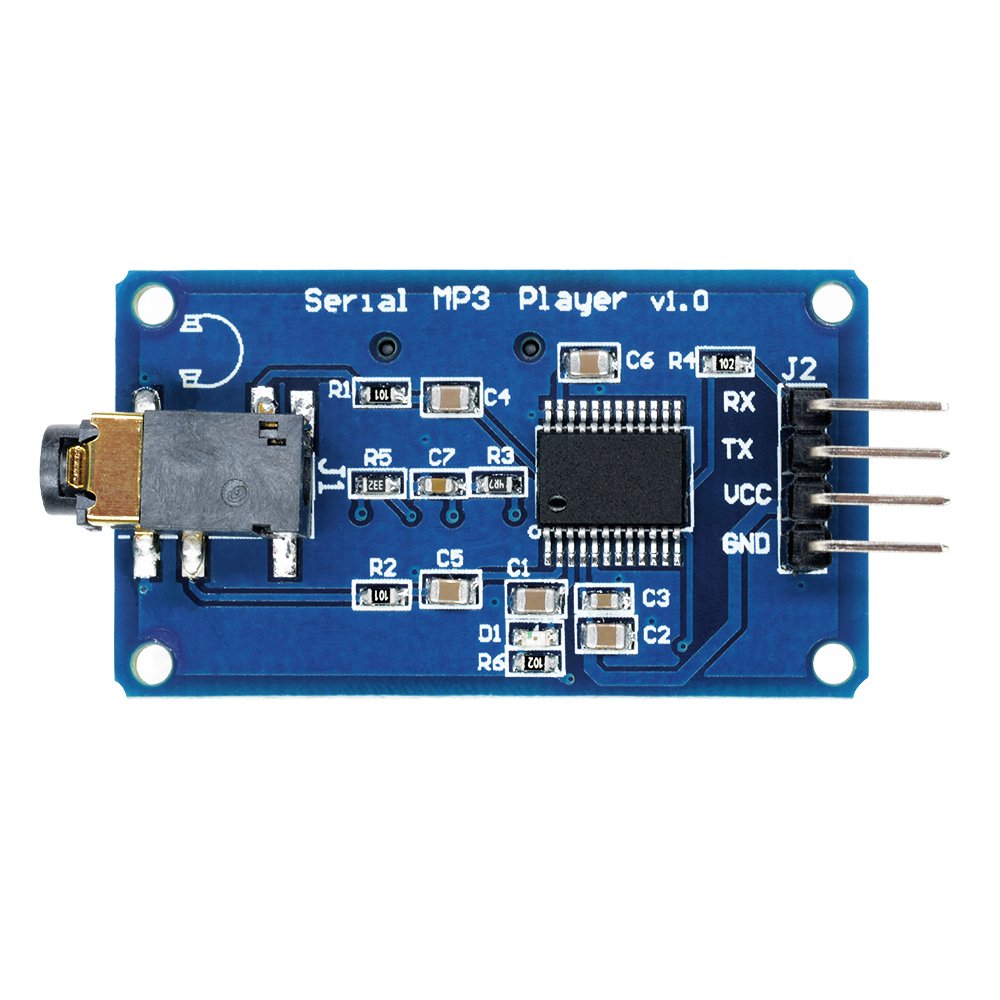
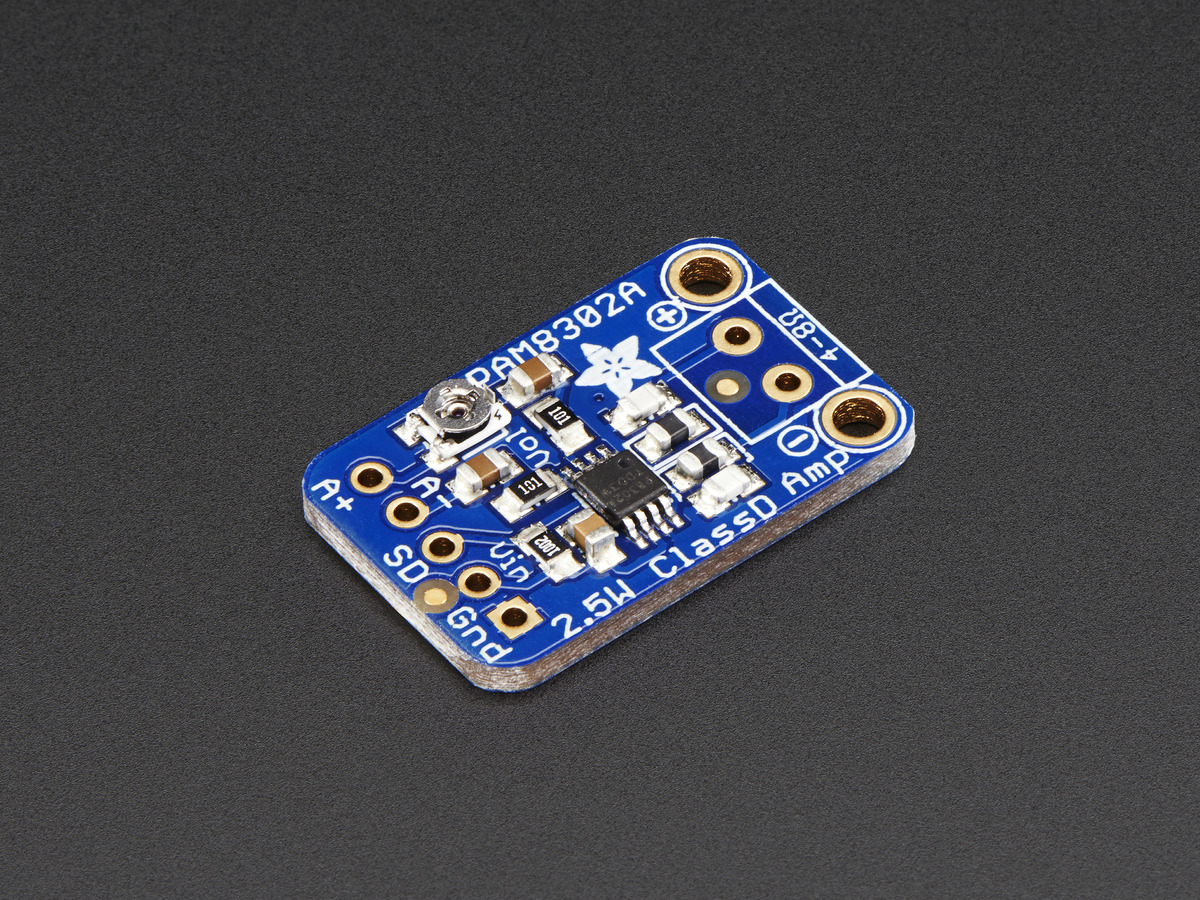
I ended up settling on a board called Serial MP3 Player from Amazon. It did not have a built-in amplifier like the Adafruit Feather Wing. It is designed to work with headphones and had a headphone jack built in. I kept the headphone jack, but soldered some wire leads to it. I then connected these leads to a standalone Adafruit PAM8302A 2.5W Audio Amplifier, which I could then wire into s small 8 Ohm Speaker 2W that I also got from Amazon. This required a lot more wiring in the car, but seemed to work pretty good. I was able to connect the serial connection for the MP3 player into any GPIO of the microcontroller and use the Arduino software serial library to control it. This keeps the SPI interface free for communicating with the Bluetooth module.

As I mentioned already, the lights on the project are Neo Pixels from Adafruit. If you buy them, make sure they are NeoPixel, cause there are other lights on the site that look just like them, but aren't as easy to control. Many NeoPixels can be chained together, and the microcontroller can control them all using a single data line. By varying the duration of how long a single bit is (by a fraction of a micro-second) you can generate a 1 or 0. Each pixel is 24-bit color.
I got two different forms of NeoPixel packages. I got a short dense strip of pixels on the Adafruit NeoPixel Stick for my KITT scanner for the front of the car. And I got a long strip of NeoPixel on a flexible strip. When buying these strips, make sure it is a Adafruit NeoPixel Digital RGB LED Strip, and not just regular RGB LEDs. The flexible strip can be removed from it's protective casing (which I did when I put some inside of the jet fan) and can be cut to any length you want.
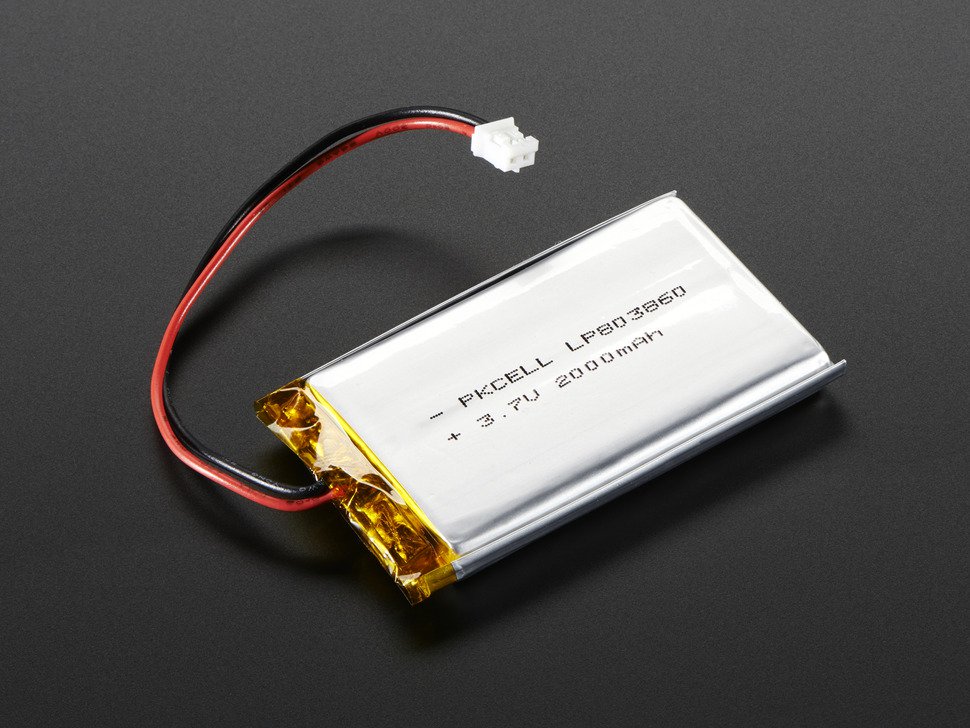
I had a 2000mAh Li-Ion battery laying around from a past project / hacker badge that I wasn't using, so i decided to use that to power the microcontroller. The feather has built in circuit to manage charging the battery when the board is plugged into USB. One lesson learned about my design is that the microcontroller is always on as long as the battery is plugged in. I needed to add a switch to the controller that would control the regulator to the microcontroller so I could "turn it off". So for now, I always have to leave the whole car on the charger when not in use. I stuck most of the audio interfacing stuff into a small Featherwing Protoboard. Most of the components are connected to the 2.54mm header connections, with the idea that I could easily remove pieces while working on the car, but the fit was so tight and difficult that I rarely removed any of the components.

Coding
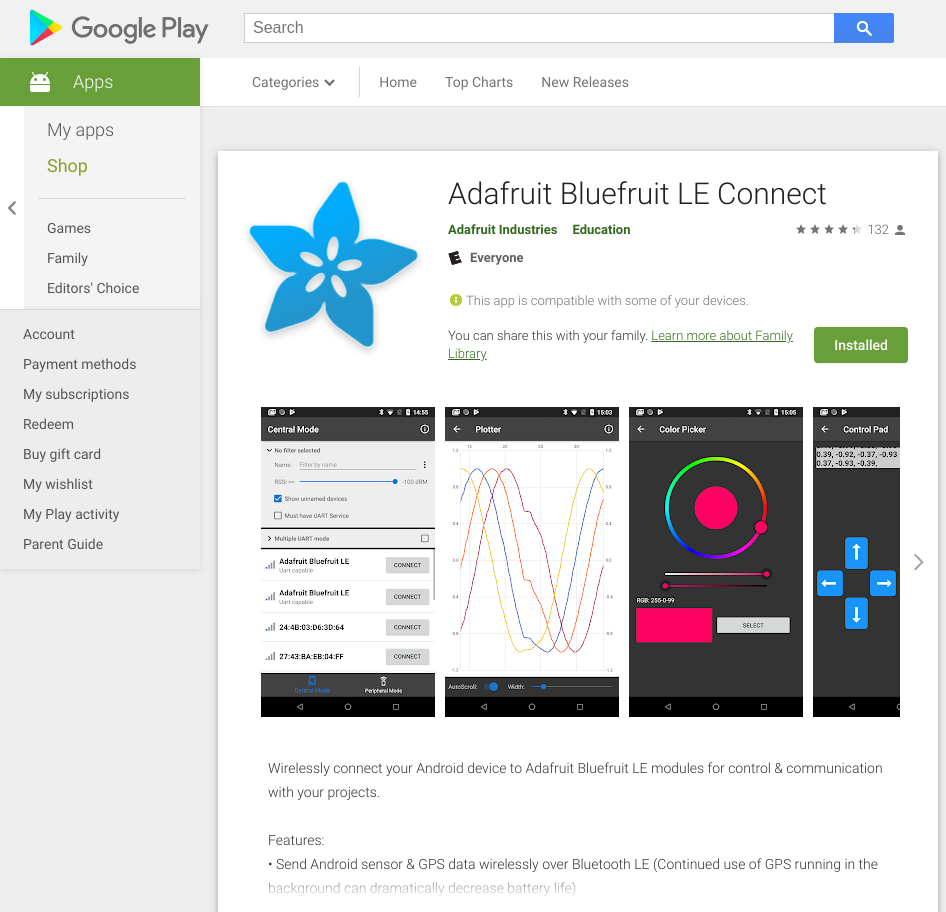
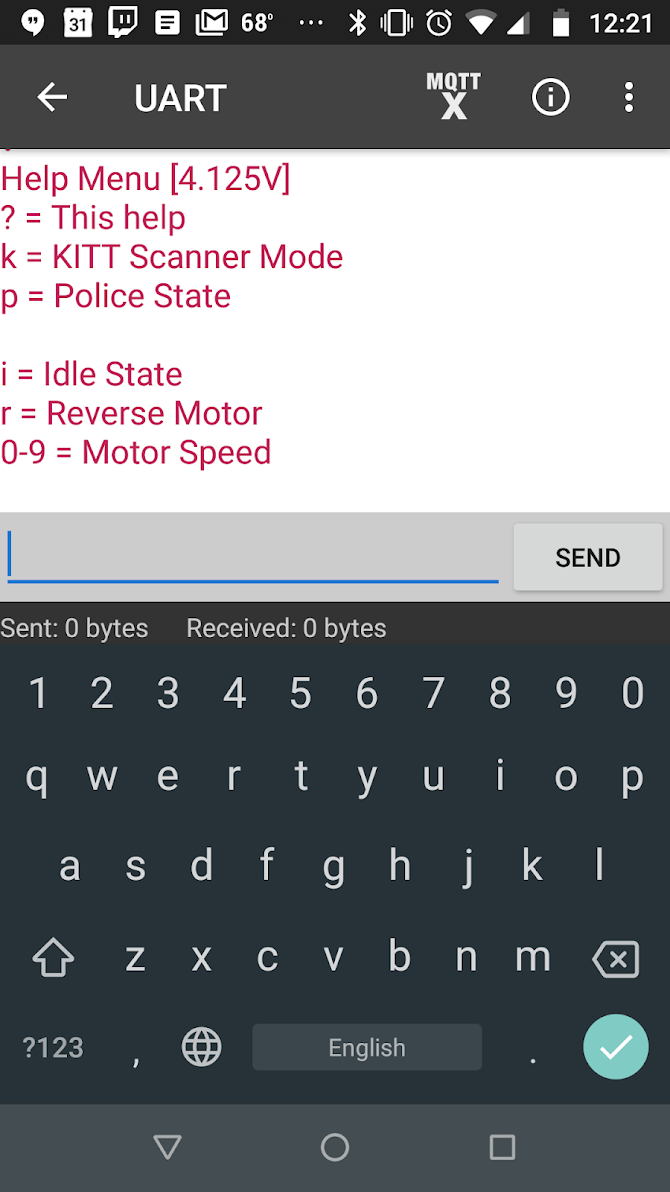
The only Bluetooth LE (Bluetooth 4.0) device I had when I started the project was my phone. I wasn't really interested in Android development, so I briefly tried to get Qt configured to deploy for Android, but I was running into a bunch of problems, and ended up running out of time to really try to get that to work. What I decided to do for the remote controller instead was just use the default Adafruit Bluefruit LE Connect Android example applications (source availabe on Adafruit's Github page) built in UART test program. I also wanted to try to use my Linux computer and the bluetooth functionality built into Qt, but I didn't have a new enough Bluetooth adapter at the time.
To start the code for the Arduino module, I took the Adafruit Bleutooth Arduino reference app source code (I think the Arduino source comes with the bluetooth libraryl, and is one of the example applications in the IDE) and used that as a starting point to make sure board initially worked OK, and then a foundation for my custom arduino application. I also integrated some source code for the serial MP3 player that an amazon review pointed me to cefaloides Arduino Serial MP3 Player github page. I added my own custom code to control the lights (make lights blink, KITT scaner). The interface to control the car was by sending it 1-byte character based commands over the UART. This would let me use the Adafruit demo app without any modification and I could implement everything on the Arduino.

Car Design
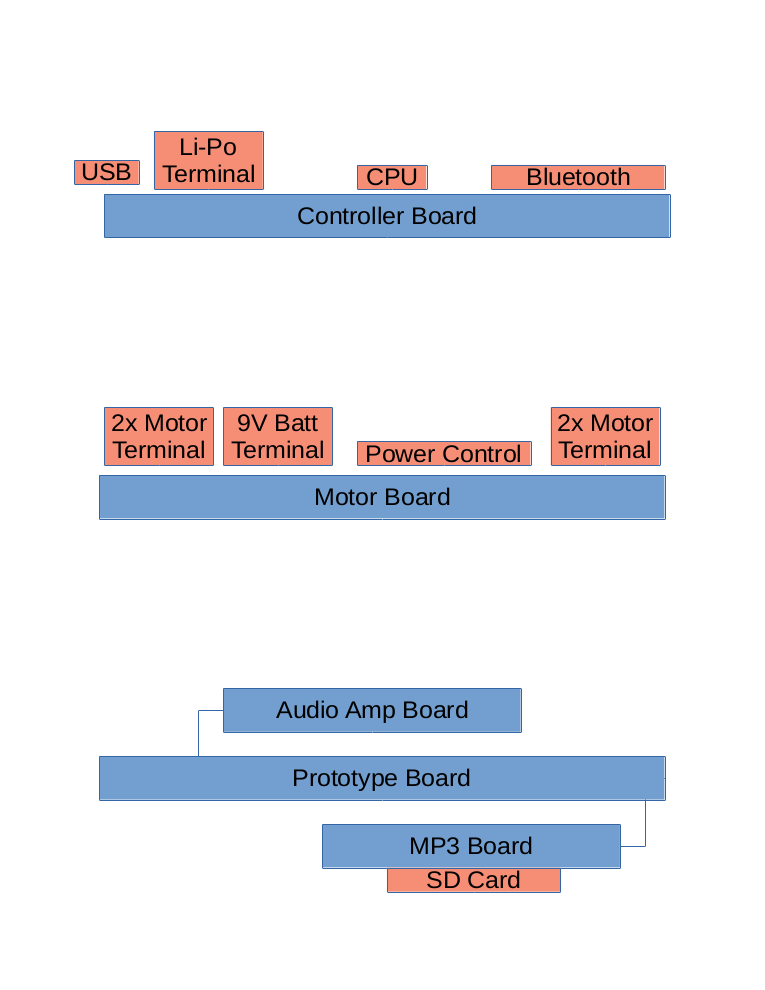
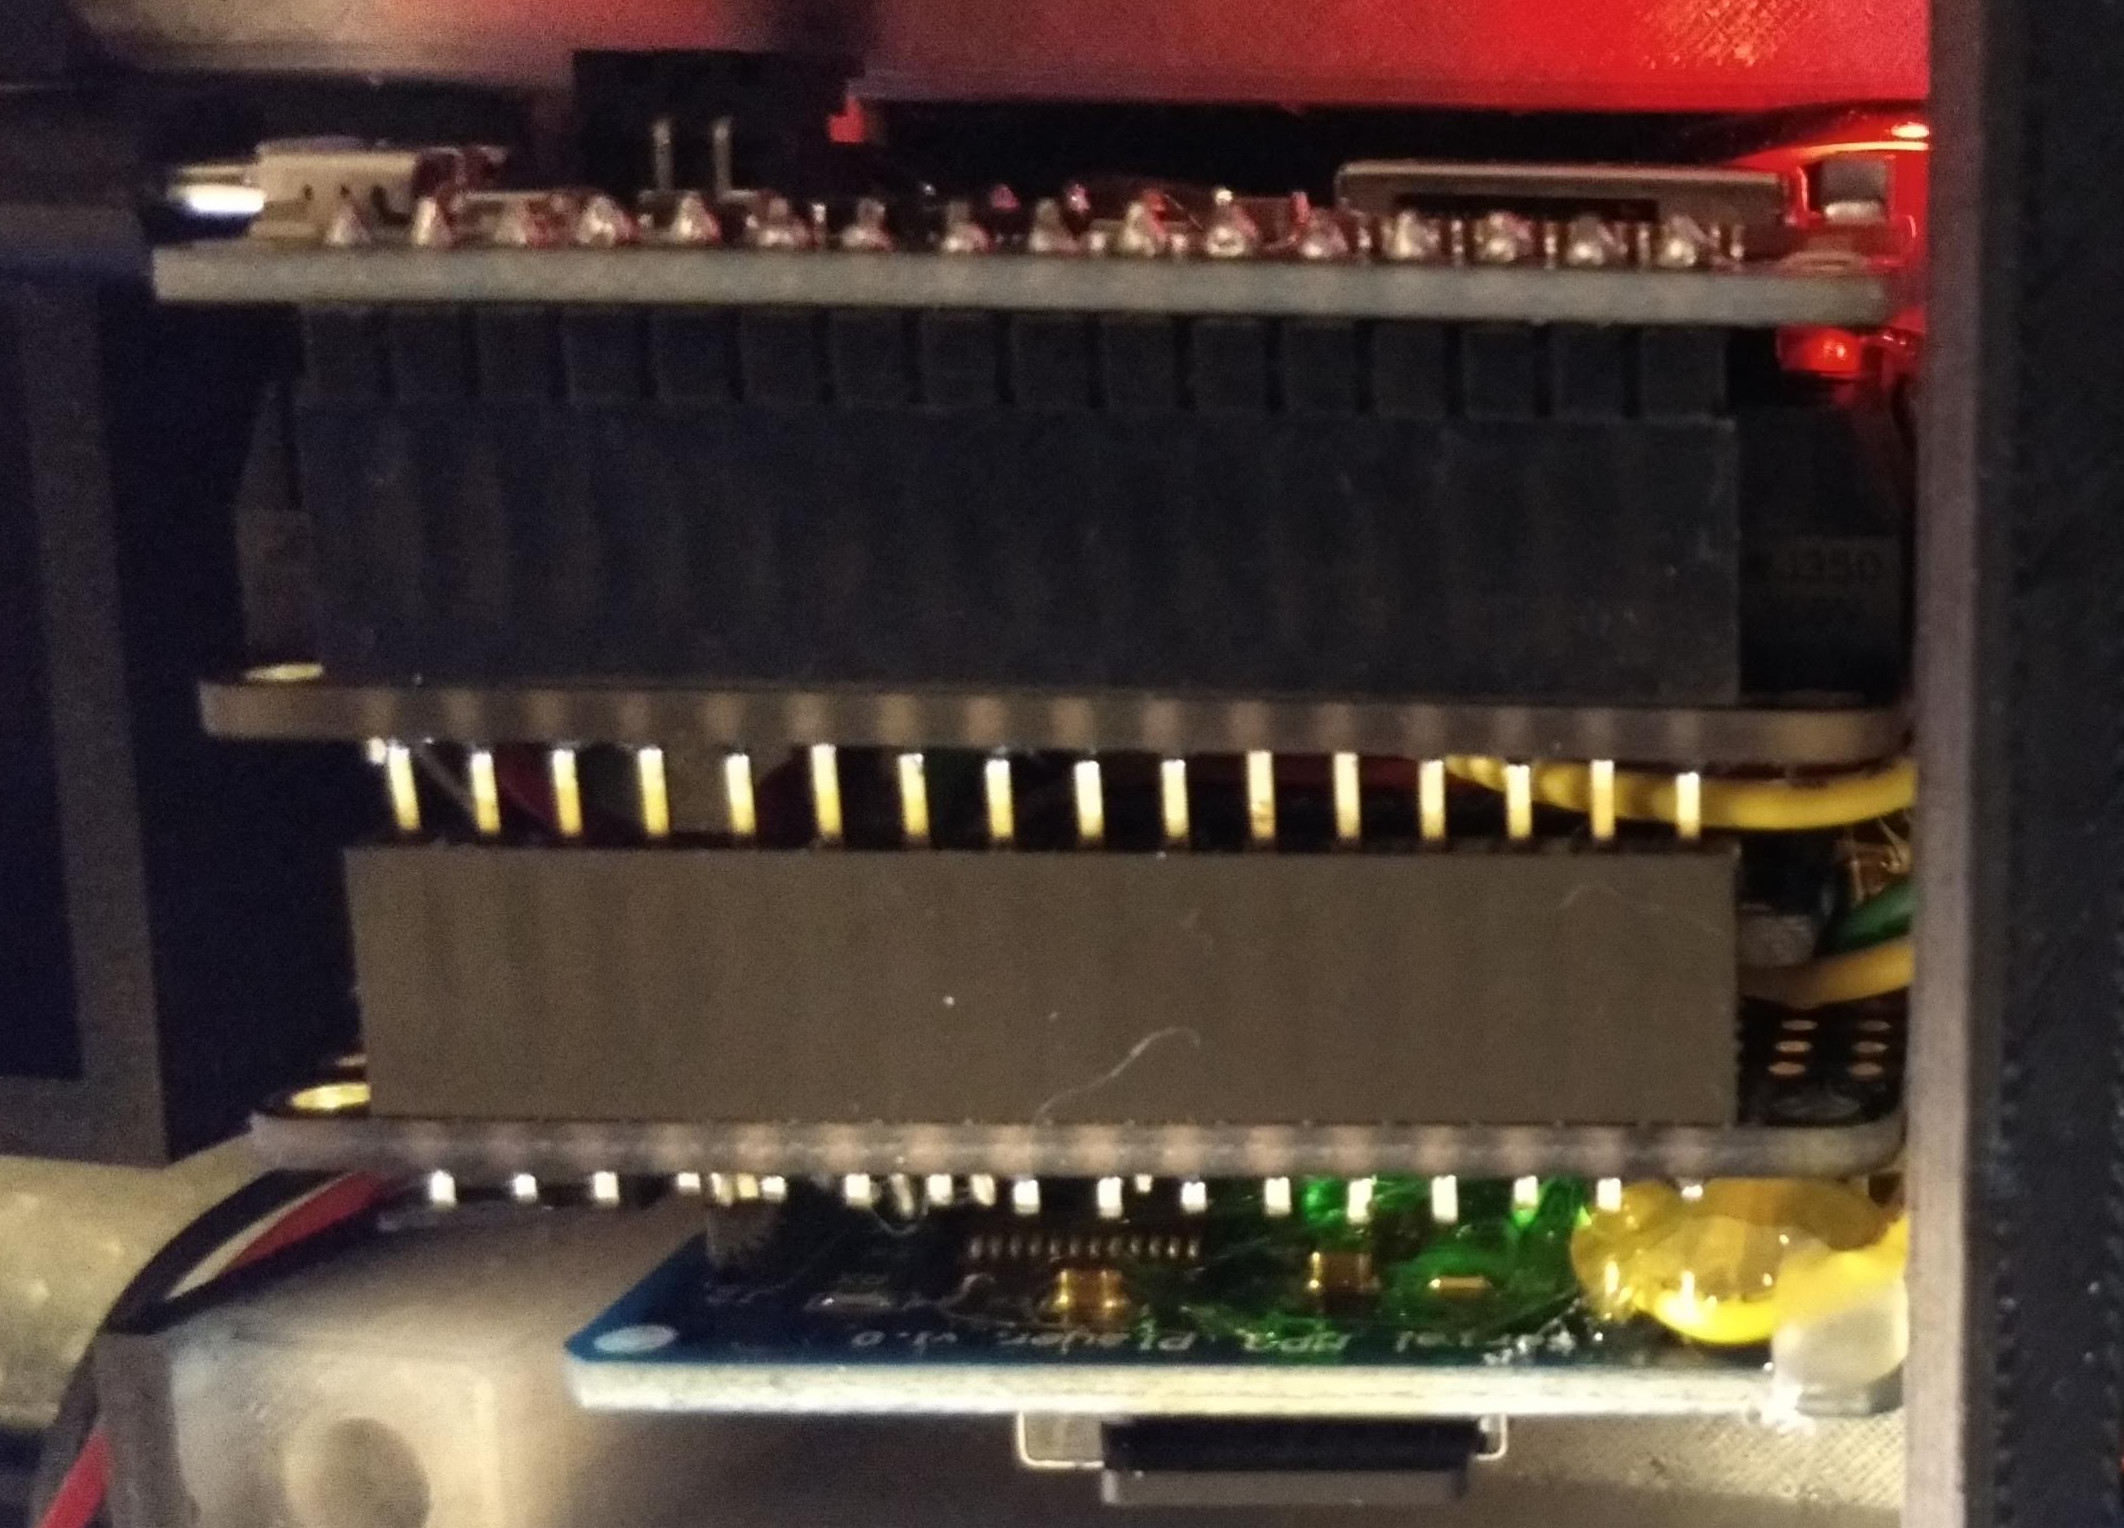
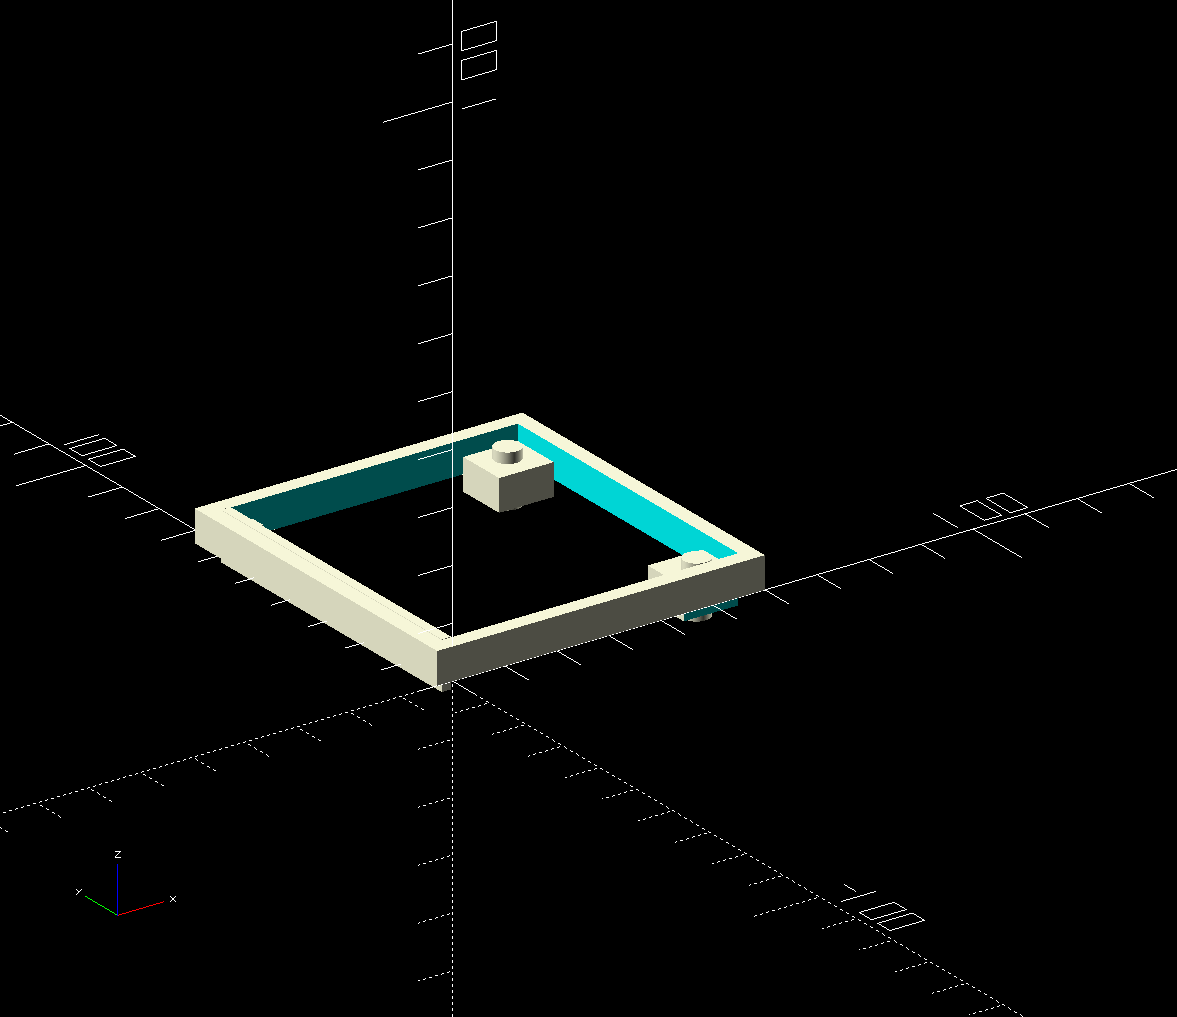
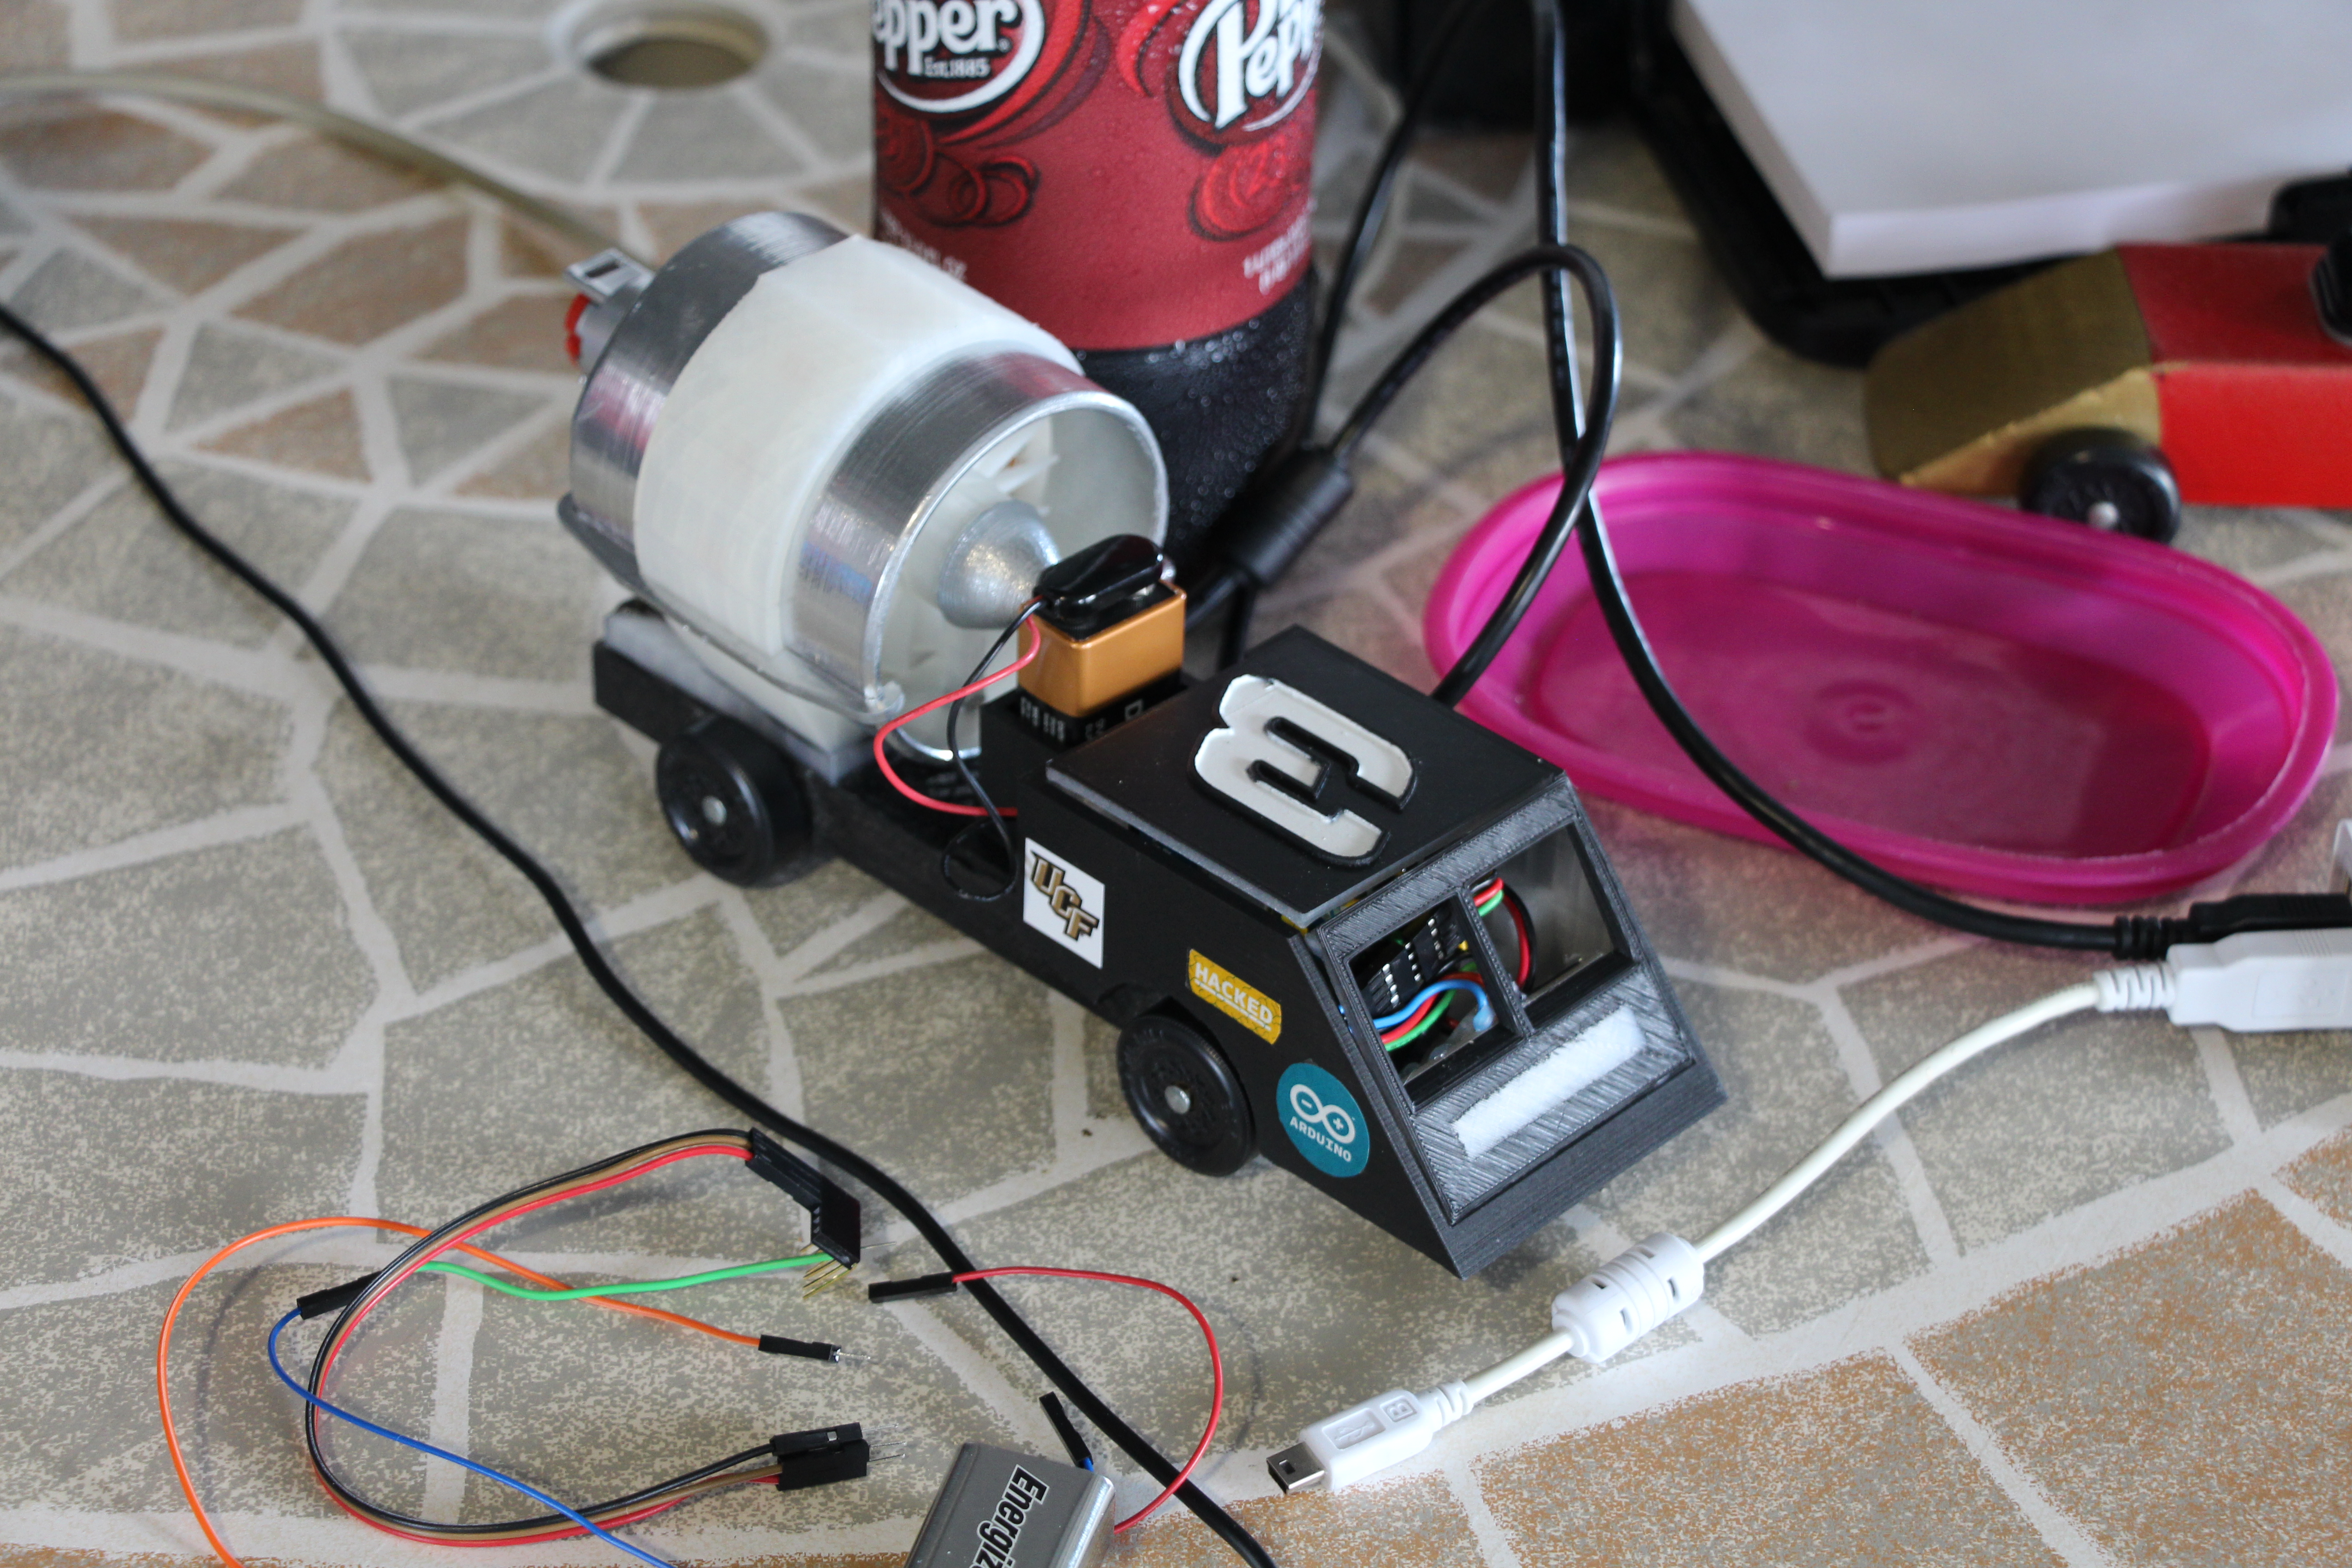
After I had the electronic components selected, I had to plan how I was going to get all the hardware into the car. The Feather microcontroller and the Feather Wings stack very nicley on top of each other. I crammed the interfaces for the MP3 player and the audio amplifier onto the protoboard. I also have wires for the LED strips come of the protoboard. The motor controller has screw terminals to connect to (which I can't get to once the stack is all connected together. You can see in the pictures below that I had the electronics planned in a different orientation, but then changed it by the time of the picture where the car is painted. I decided it would be easier to access the USB charging port, the motor control board, and easier to get wires from the protoboard to the front "seating area" of the car if it was mounted how you see it in the painted car.


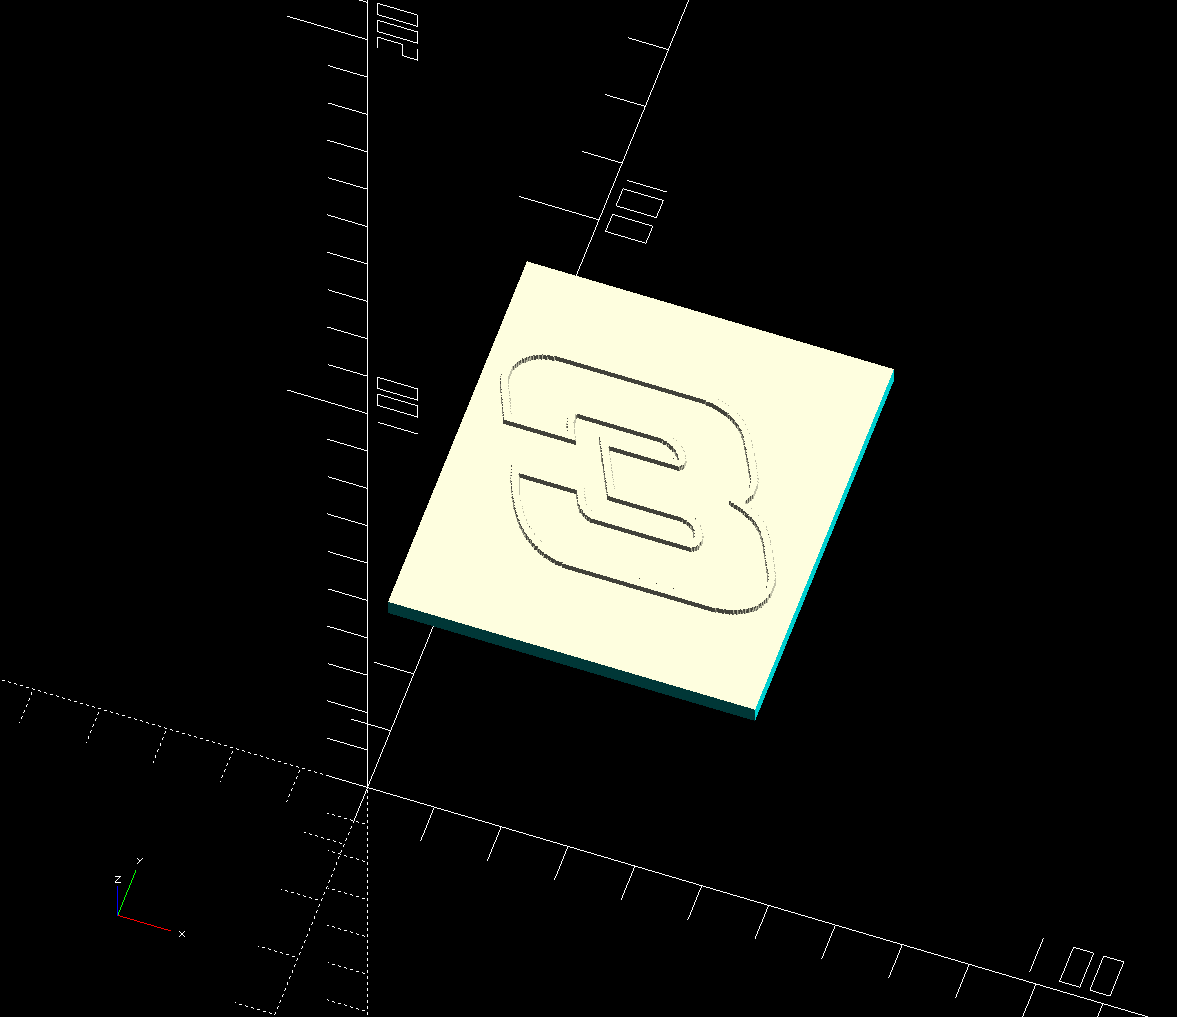
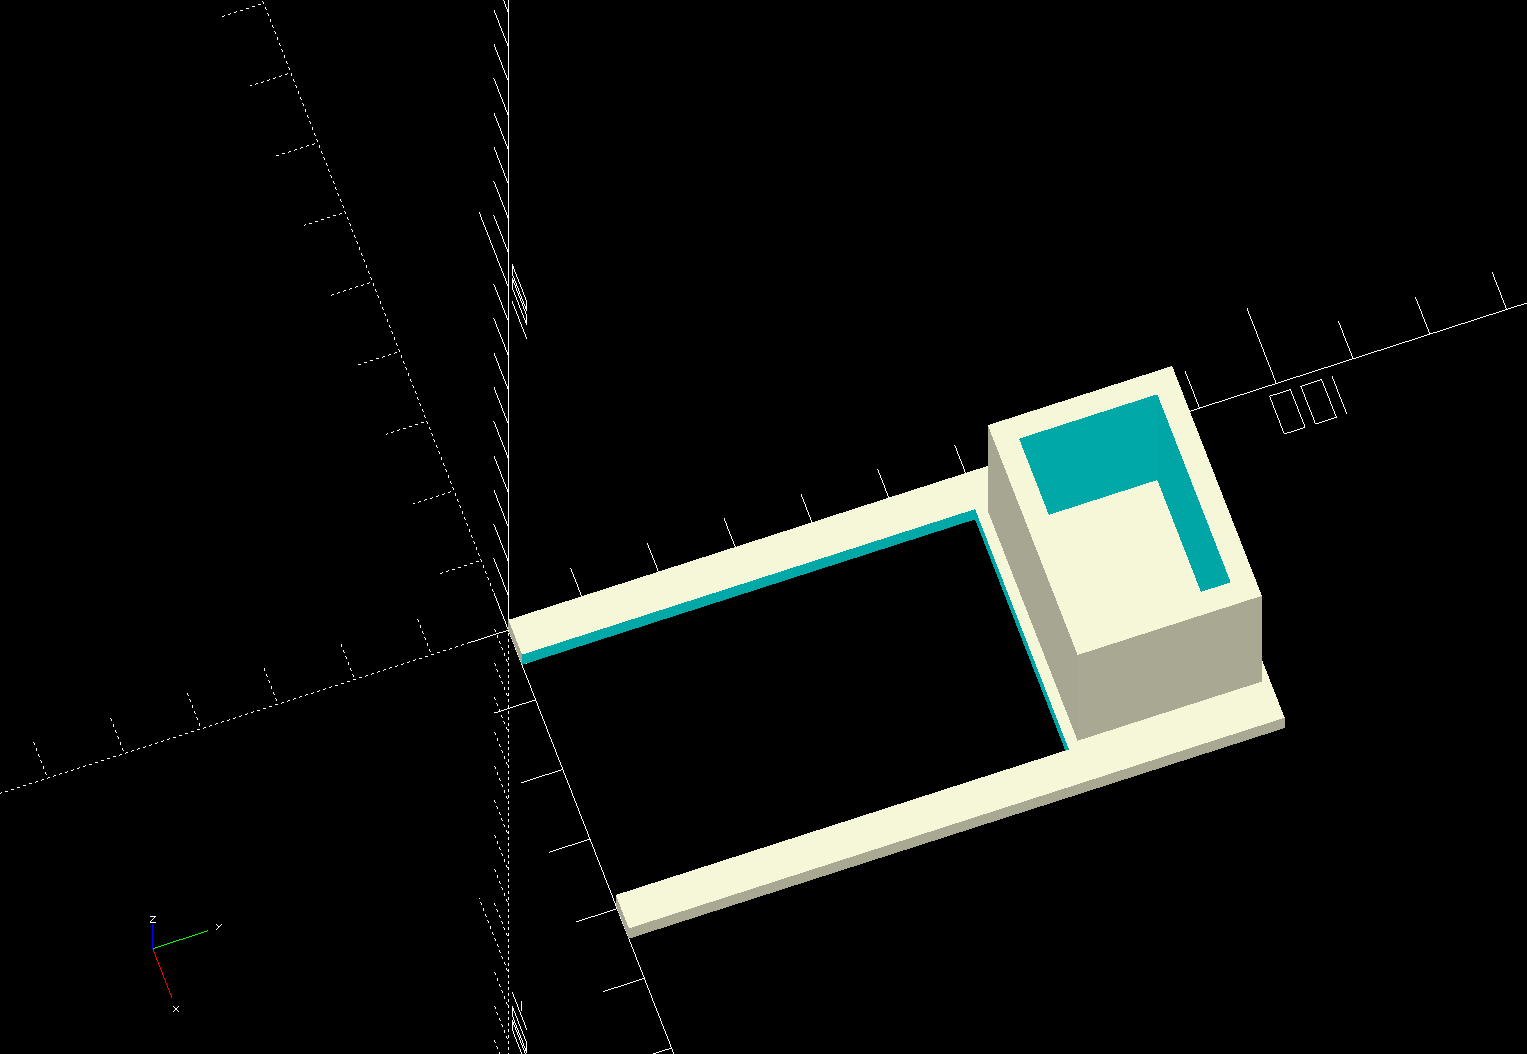
I made a very crude car / truck front end in OpenSCAD for the pinewood derby car. I made it wider than the tires, so I had to cut out fender-wells for the wheels of the pinewood derby car. The very front of the car actually extends past the block of wood. At the very bottom of this piece I made a grill for the small speaker for the project, and the speaker is mounted up there and faces down. This probably doesn't do much for audio quality, but it is the only pinewood derby car that I have ever heard make sound. I put two windows in the front of the car and I built a separate roof that I could take on and off seperately to get inside at the electronics easily. It really slows down SCAD, but you can import artwork as 2d shape and then extrude it out into 3d shapes. I added the Dale Earnhardt #3 to the top of my car as well.
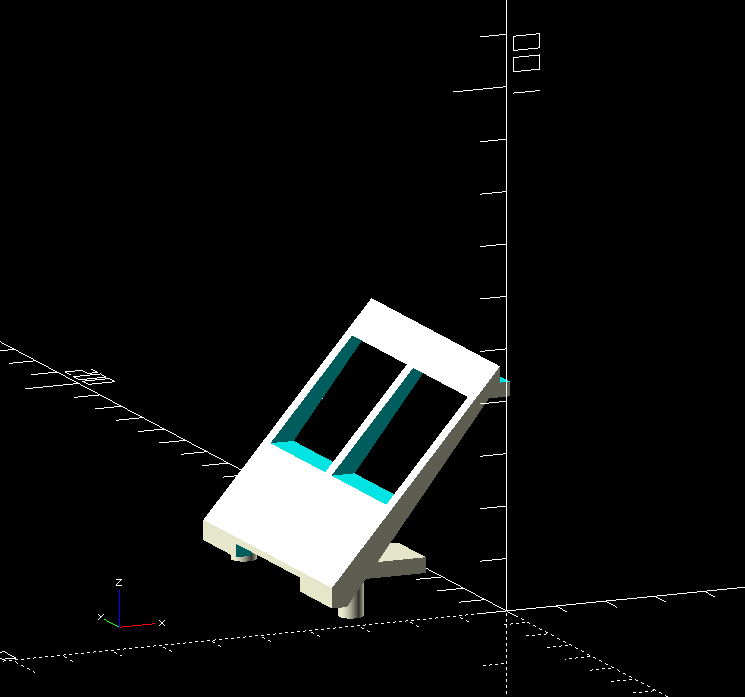


I designed in a little shelf behind the windshield to hold the NeoPixel strip above the speaker. I painted most of the front of the car black, but I left a small section of the car unpainted and left the clear plastic exposed. The NeoPixel strip is mounted behind this, and can shine through and be nicely defused by the transparent colored plastic.


At this stage in the design I was also kind of rushing things to get it done in time, and I didn't quite do a great job measuring things. Turned out my fender wells weren't large enough, and I also needed a 9V battery holder for the DC motor battery. Since I needed to raise the fenders up, I made the battery holder go all the way underneath the front of car and raise it up a few millimeters. This also created more room to store the Li-Po under the electronics. I was also worried about the roof not fitting on the car, so I made a roof extender frame (so I can raise the roof!).
Painting and Assembly
Using some of the paint leftover from some previous pinewood derby builds. I painted most of the front of the car and the wood block itself black. After the black dried, I taped up the number 3 on the roof, and then painted in the the number 3. Most of the jet fan I painted silver, and some parts I left unpainted so they would remain transparent for the lights to shine through.


The block was cut down to 15mm high (I wanted it as short as possible to save weight, knowing the car was probably going to be well overweight anyways). I ended up cutting it down too short, and the wheels would have rubbed on the jet fan. I printed some extra plate pieces to raise the jet fan and DC motor stand up a little higher.
I hotglued the light strip inside of the jet fan, and then assembled the fan together. It either got too tight or slightly misaligned during the assembly, because the fan never turned as freely anymore once it was glued together as it did when I was just holding the parts together.


To wire the electronics up to the jet fan, I chiseled out a channel on the bottom of the car to run the wire in. I also put a connected down in the channel to give me the ability to disassemble it later if needed.

The electronics fit okay in the front of the car, but the wiring was very cramped. I probably could have used a smaller gauge wire for most of connections. It all fit within the car, but the wires would frequently prevent the roof from staying tighly on top of the car.
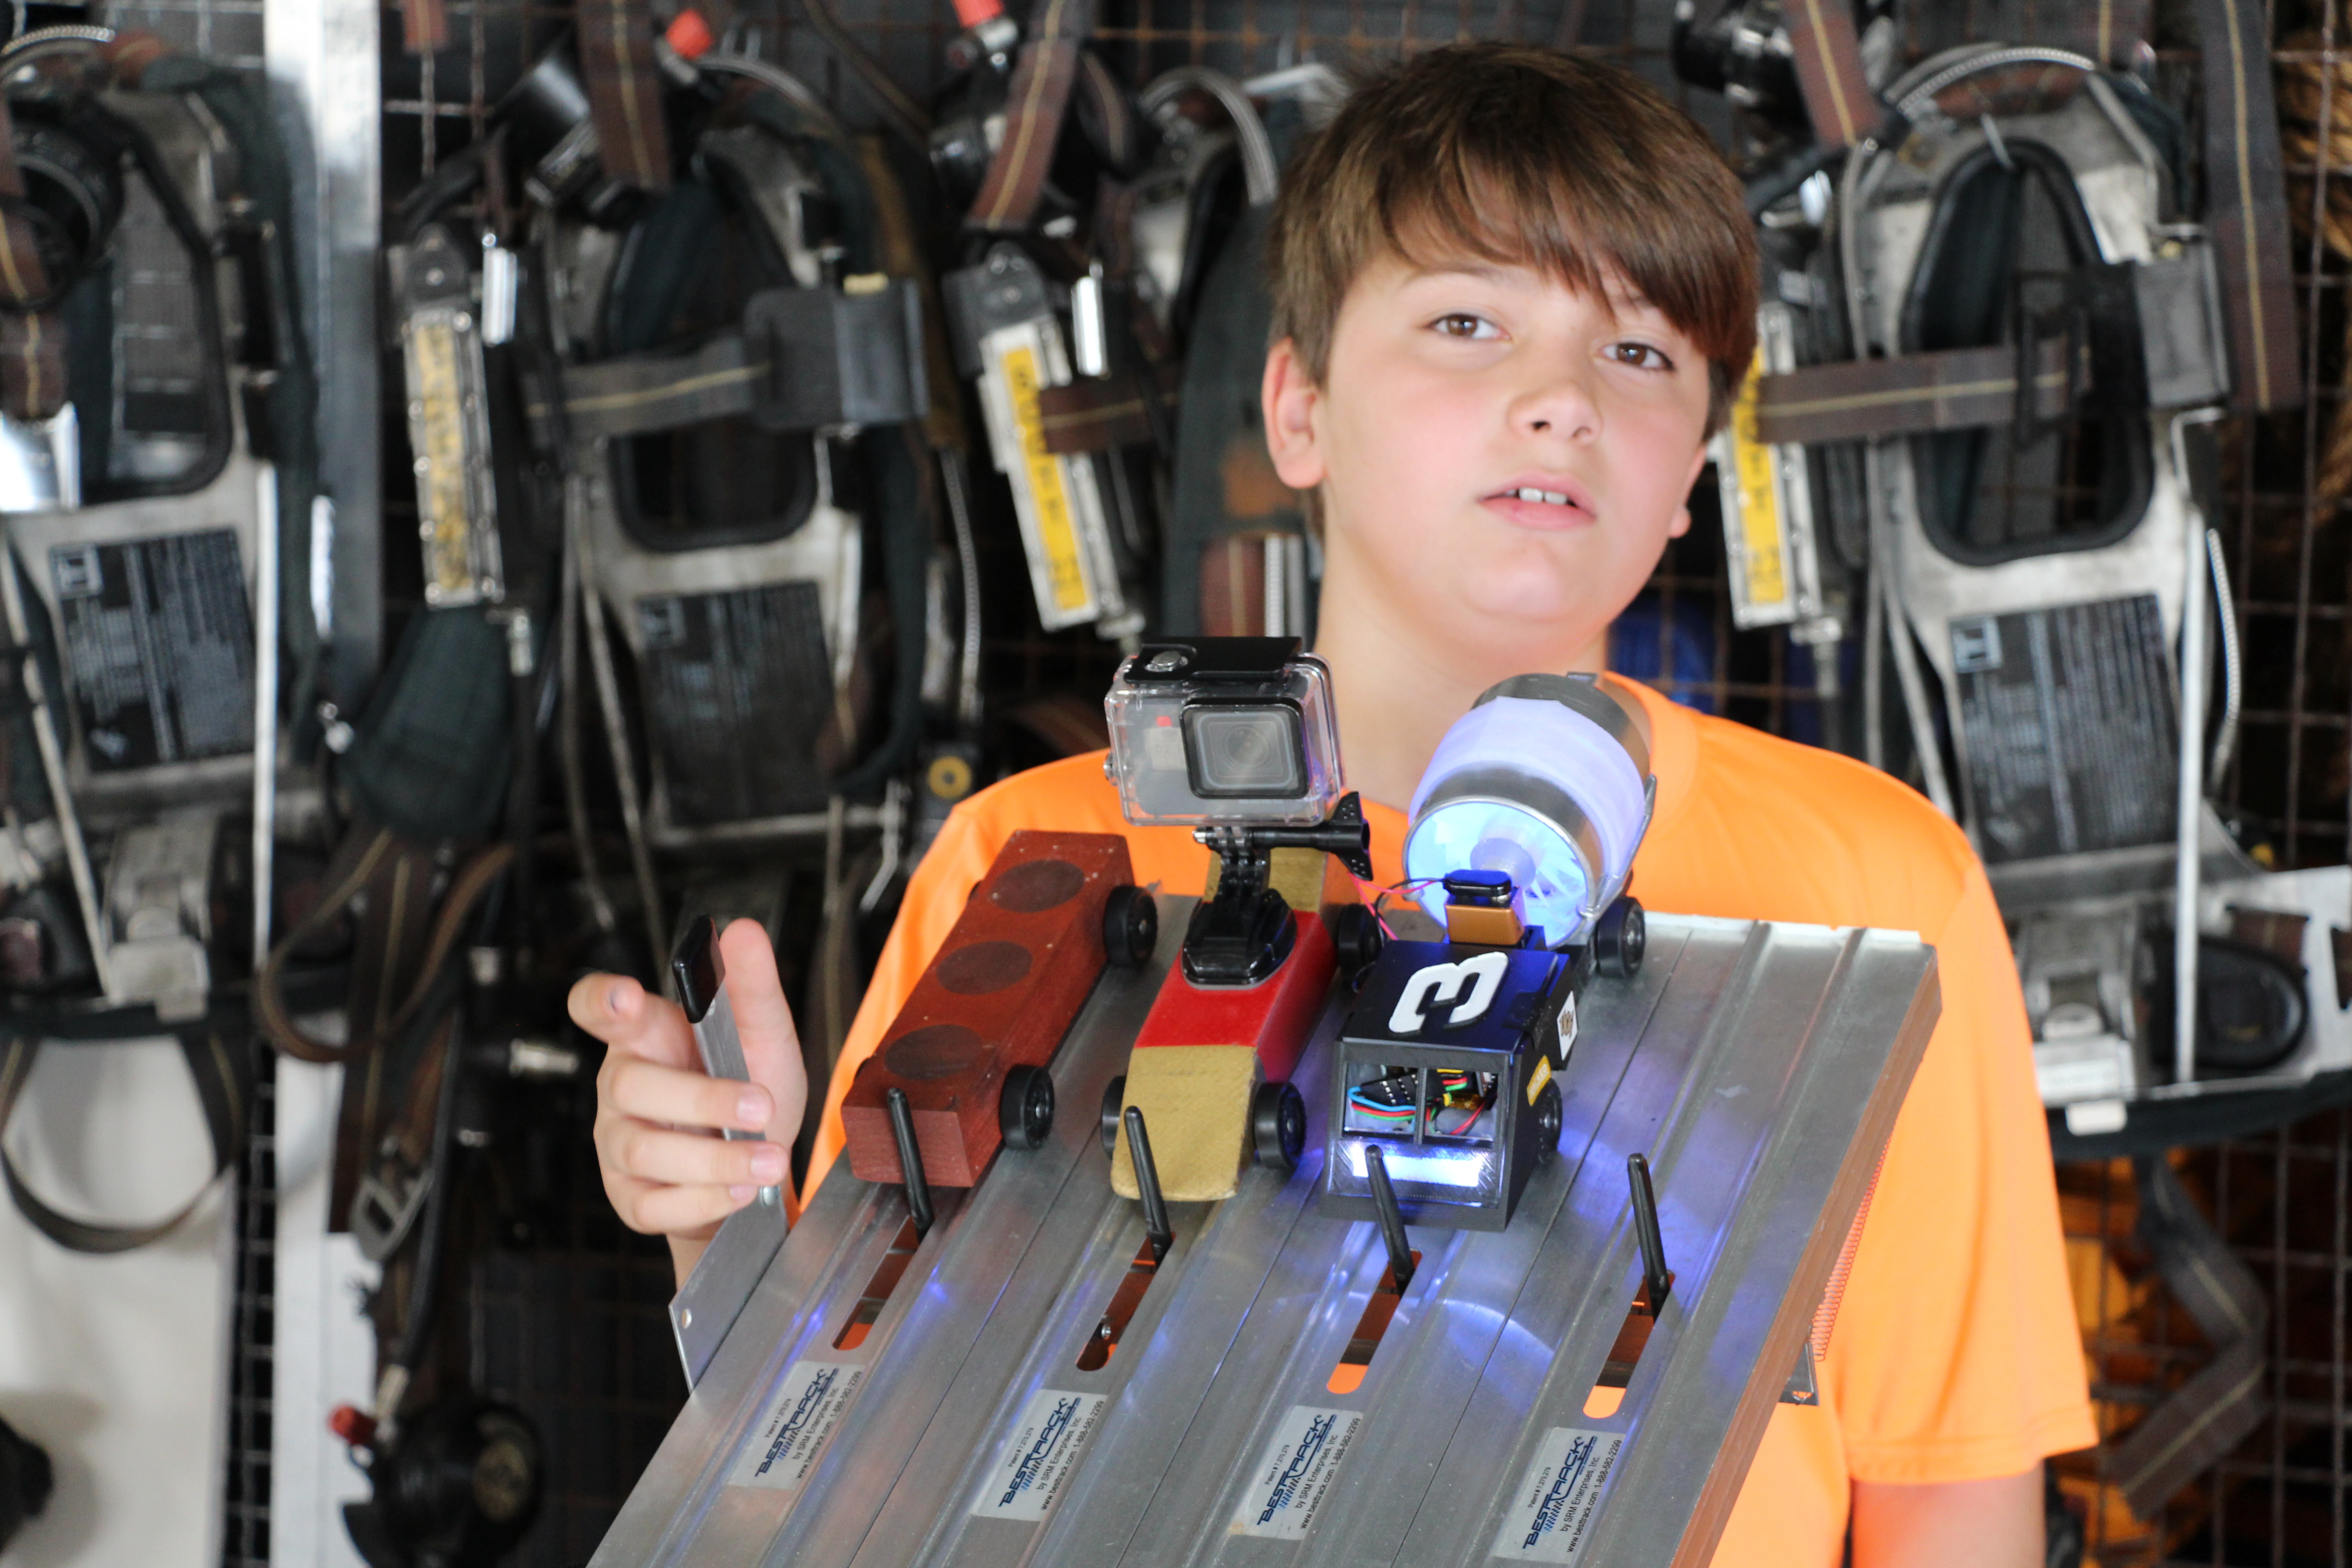
Race Day
The bluetooth radio worked great, and I never had any problem with it, and I could talk to the car from almost anywhere in the building we held the race. I just sat the car on the table, and when kids and parents came by the table to look at the table, I could remotely activate the lights on the car.
Alkaline 9V batteries were not nearly powerful enough to spin the fan very fast, or for very long. I later found Lithium Ion rechargeable 9V batteries on Amazon that would have worked much better. I didn't do the usual go-fast tricks required of a pinewood derby to make the cars really fast, so my car was not very fast. The fan didn't spin fast enough to make any measureable difference in performance.


More Videos